Mold Inspection & Testing
Moisture Mapping in Frederick, MD
Moisture mapping turns a series of instrument readings into a documented picture of where water has traveled through a building and to what degree materials have been affected. It's the foundation of any well-scoped remediation project — and the only way to confirm that materials have reached dry standard after a drying event.
Dry Standard: The Numbers That Matter
IICRC establishes dry standard as the moisture content of unaffected materials in the same structure. As a practical benchmark, wood framing should be below 16% moisture content and drywall below 1% equilibrium moisture content (EMC) to be considered dry. Any material reading above these thresholds during a post-drying check has not yet reached dry standard and should not be enclosed.
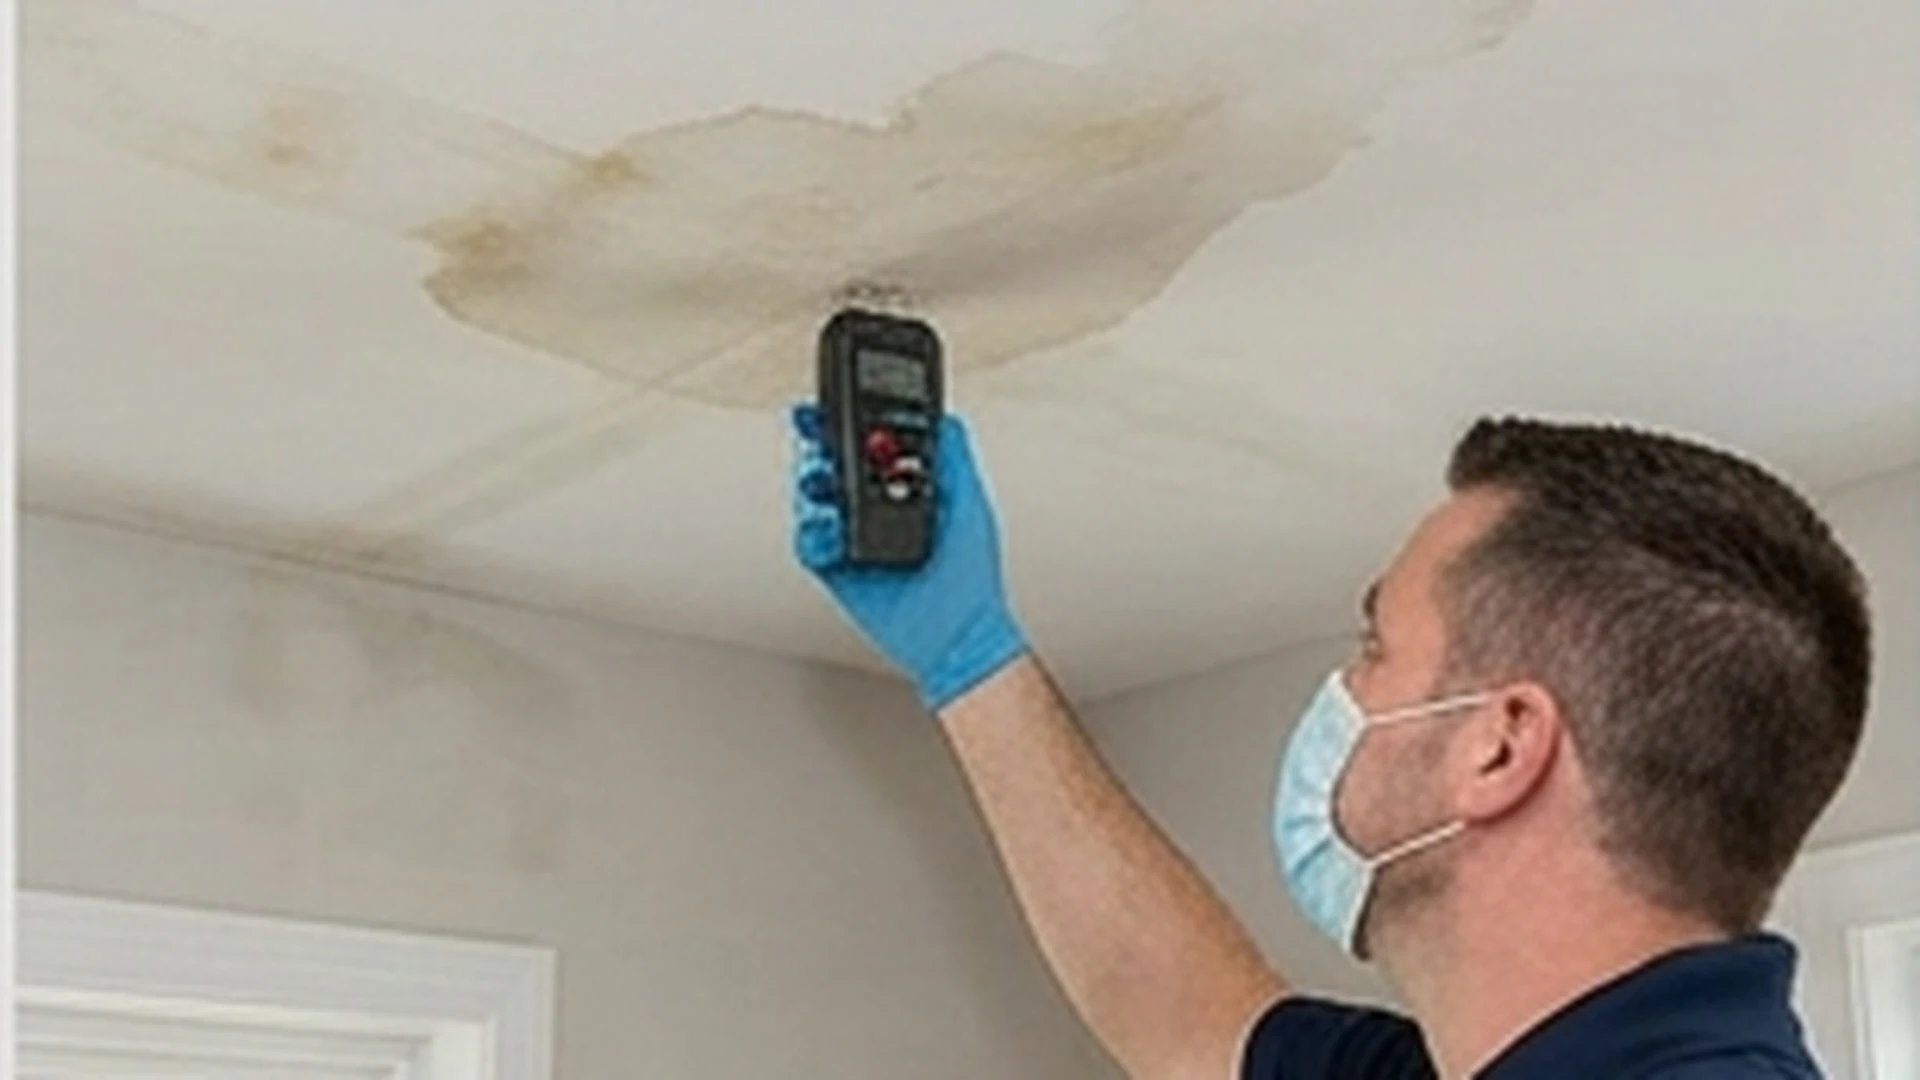
Pin vs. Pinless Meters — Different Data, Used Together
Pin-type moisture meters penetrate the surface and give a direct MC reading at the probe depth. Pinless meters use electromagnetic signals to scan a larger area and detect subsurface moisture without surface penetration. We use both — pinless to scan efficiently across large surfaces and identify anomalies, pin meters to confirm and quantify at flagged points.
Thermal Imaging for Hidden Moisture
Evaporative cooling creates detectable temperature differentials on wet surfaces. Thermal imaging cameras reveal moisture behind finishes — inside wall cavities, under flooring, and above ceilings — that meters can't reach without destructive investigation. We use thermal imaging as a scanning tool, then confirm with contact meters at any anomaly.
Why Moisture Mapping Is Essential After Water Events
After a water event — pipe burst, appliance leak, storm intrusion, or flood — the visible water is usually obvious. The moisture that has wicked into wall framing, traveled under flooring, or migrated into adjacent wall assemblies is not. Remediating only the visible wet areas and skipping moisture mapping routinely results in mold appearing inside walls several weeks later, after reconstruction has covered everything.
A moisture map created at the time of the event establishes the extent of migration — which walls are wet on both sides, how far under flooring the water traveled, whether ceiling joists above the event area are affected. That map drives demolition scope: only remove what's wet, but remove everything that's wet. It also establishes a drying baseline so that daily monitoring can confirm when materials reach dry standard and drying equipment can be removed with confidence.
Floor Plan Grid Documentation
Moisture readings are recorded on a scaled floor plan with a grid overlay, typically at 2-foot intervals in affected areas. The resulting moisture map shows the gradient from wet to dry, identifies the perimeter of the affected zone, and serves as the demolition scope document.
Daily Monitoring During Active Drying
Effective drying requires measurement, not assumption. We provide daily moisture monitoring during active drying projects, updating the moisture map with each visit to show progress, identify areas that aren't drying on schedule, and confirm when all materials have reached dry standard and drying equipment can be removed.
Pre-Closure Verification Before Reconstruction
Before any drywall, flooring, or insulation is reinstalled over a previously wet area, we document final moisture readings at every point in the affected zone. Pre-closure readings go into the project record as confirmation that no wet materials were enclosed — documentation that protects both the homeowner and the contractor.
Moisture Mapping for Insurance Documentation
Insurance adjusters and restoration contractors need documented moisture readings to scope claims and verify work. Our moisture maps include date-stamped readings, photo documentation, and a narrative that is legible to an adjuster. We produce documentation in a format carriers accept.
Moisture Mapping Process
- Initial Scan — Thermal imaging sweep across all affected and potentially affected areas to identify anomalies requiring meter confirmation.
- Grid Readings — Pin and pinless moisture meter readings at grid points across the affected zone, documented on floor plan.
- Map Delivery — Annotated floor plan with moisture readings, thermal images at anomaly locations, and summary of findings.
- Monitoring or Verification — Follow-up readings during drying or pre-closure verification at project completion, as needed.
Know exactly where the water went before you start rebuilding.
Do I need moisture mapping if I already know where the water came from?
Knowing the source doesn't tell you how far the water traveled. Water follows gravity and wicks through porous materials — it often ends up in rooms adjacent to the source or in subfloor assemblies below the event. Moisture mapping confirms the extent of migration so you know the full scope of what needs to be addressed.
How long does moisture mapping take?
An initial moisture mapping of a typical affected room or zone takes 1–2 hours, including thermal imaging and grid readings. Larger events affecting multiple floors or extensive subfloor areas take proportionally longer. Follow-up monitoring visits are typically 30–60 minutes.
Can moisture mapping help if the water event happened weeks ago?
Yes, but with some nuance. Materials that have been wet for weeks may be drying, partially dried, or have developed mold. Current moisture readings tell us what's still wet; they can't fully reconstruct the original extent of the event. If significant time has passed, we combine moisture mapping with a mold inspection to assess both the current moisture state and any mold that may have developed during the wet period.
Mold Inspection
Full inspection combining moisture mapping with visual and sampling assessment.
Water Damage Mold Cleanup
Integrated water damage and mold remediation following moisture mapping findings.
Post-Remediation Verification
Pre-closure moisture verification before reconstruction after any water or mold event.